
この記事はv6.6のものです。v7に対応した記事を以下に記載しております。 |
みなさんこんにちは、szkです。
本職が多忙すぎて1か月間も放置してしまいました。
こんなに更新しなかったのは久々ですね。
本当はResolumeの記事やらVJの記事やらやりたいのですが、今日はエンジニアの話をば
おうちロガー作りたい!
szkの家はスマートホーム家電がいくつかあります。
・GoogleHOMEのはなし
・Natureremoのはなし
・PhilipsHUEのはなし
これらの機器はAPIに対応しているので、自宅のサーバからロギングすればきっと何かが見えるはず!
と思って作ってみたのがこちらです。

上から
・szkが家にいるかどうか
・Iphoneが家にあるかどうか(iPhoneの仕様上うまく動いてない)
・家の温度ロガー
・家の湿度ロガー
・家のエアコンの稼働状態と設定温度のロガー
です。2019年3月現在、いろんなデータを集めています。
そして、今回このロガーは「Elasticsearch」とその可視化ツールである「Kibana」を使って実装しています。
今回はこれらの実装メモとしてまずElasticsearchのインストールを記事にしてみました。
Elasticsearchとは
Elasticという会社が開発を進めているオープンソースの検索エンジンです。
Javaベースの検索エンジン「ApacheLucene」をベースに、API化と並列処理に特化したものがElasticsearchとなります。
また、Elastic社の開発するElasticsearchを含むソフトウェア軍を「ElastiStack」といい、WebGUI上で可視化するソフトウェアが「Kibana」です。
他にも複数のソフトウェアがありますが、今回は主にElasticsearchとKibanaを使用していきます。
使用する環境
今回の環境の紹介です。
OS:CentOS7.6(Hyper-v上のVM)
CPU:2vCPU
Mem:4GB
Elasticsearch:Version6.6.1(2019/02/19)
Kibana:Version6.6.1(2019/02/19)
※HDDはOSは60GBもあれば十分ですがElasticsearchのインデックスデータを補完する領域は多めにとっておくと多くのデータを保管できます。
インストール
インストールはメーカーサイトを参照するのがおすすめです。
なぜならElasticsearchはバージョンアップが激しく、インストールやコンフィグレーションが1年経つと陳腐化します。
この記事も来年の今頃には古くなっているはず。。。ですが、といってもそれではあまりにも投げやりですし
メーカーのインストールガイドも少し見づらかったりするので参考程度に記載しておきます。
※前提条件
インストールに前提条件があります。気を付けてください。
前提条件はリリースノートに記載があります。
いくつか条件がありますが、「とりあえずインストールできる+動く」ということであれば
Version6.6.1の場合「Java OpenJDK V1.8.0_131」以降がインストールされていることが条件となります。
今回の環境であるCentOS7.6であればCentBaseリポジトリからのインストールでOKです。
yum install java
・Linux環境でのElasticsearchインストール
RPM版を使うとインストールが楽です。
cd /tmp

wget https://artifacts.elastic.co/downloads/elasticsearch/elasticsearch-6.6.1.rpm

rpm -ivh elasticsearch-6.6.1.rpm
インストールだけであれば上記コマンドで完了します。
・Linux環境でのKibanaインストール
Kibanaも同様に
cd /tmp

wget https://artifacts.elastic.co/downloads/kibana/kibana-6.6.1-x86_64.rpm

rpm -ivh elasticsearch-6.6.1.rpm
これでインストールは完了です。
コンフィグレーション(Elasticsearch)
Elasticsearchのコンフィグレーションを行います。
設定の前に設計が必要ですが、主に気を付ける点は以下の通り
・クラスタ構成かどうか
→Elasticsearchはデータを「index」という単位で保持しますが、クラスタ構成の場合は複数のノードで管理を行います。
もちろん、シングルノードの場合は1つが停止した時点でサービスがダウンするので注意が必要です。
また、クラスタ構成の場合は以下の役割が必要となります。
1.MasterNode
→クラスターを制御するノードです。マスターの機能を持ったノードが1台もいなくなるとサービス停止となります。
推奨は3台です。このノードはデータを保管しません。
2.DataNode
→データを保管し、検索の際に問合せに応答するノードです。このノードが2台以上あることでデータの冗長性が取られます。
3.CoodinatingNode
→クラスタ構成の場合、データを投入及び検索する際にロードバランサとして機能するノードです。
推奨台数はありませんが、1台で構成するとこのノードが消失したときにサービスが停止します。
このノードはマスターノードとしてもデータノードとしても機能しません。
また、v6.6.1時点では「マスターとデータノードを兼用するとメモリスワップを引き起こして停止するバグ」が存在します。
クラスタ構成で真面目に組むと「マスター3台、データ2台」で最低5台のマシンが必要になります。
ので、今回はシングル構成(マスター&データ兼用冗長無し)で行きます。
・データディレクトリの設定
データディレクトリの指定は結構大事です。
あらかじめデータ容量の多いドライブをマウントしておきましょう。
ちなみにCifsなどをマウントしてもOKです。
・ネットワーク設定
デフォルトのネットワーク設定では127.0.0.1以外のアクセスはシャットアウトされています。
メーカー推奨値というわけではありませんが、利便性的には0.0.0.0(全て許可)にしたうえでFirewalldで制御したほうがスマートでしょう。
・まとめると
こんな感じ
# ======================== Elasticsearch Configuration =========================
#
# NOTE: Elasticsearch comes with reasonable defaults for most settings.
#       Before you set out to tweak and tune the configuration, make sure you
#       understand what are you trying to accomplish and the consequences.
#
# The primary way of configuring a node is via this file. This template lists
# the most important settings you may want to configure for a production cluster.
#
# Please consult the documentation for further information on configuration options:
# https://www.elastic.co/guide/en/elasticsearch/reference/index.html
#
# ---------------------------------- Cluster -----------------------------------
#
# Use a descriptive name for your cluster:
#
#cluster.name: my-application ←クラスターを有効にするときはコメントアウトを外す
#
# ------------------------------------ Node ------------------------------------
#
# Use a descriptive name for the node:
#
node.name:   ←適当な名前を、コメントアウトを外す
#
# Add custom attributes to the node:
#
#node.attr.rack: r1
#
# ----------------------------------- Paths ------------------------------------
#
# Path to directory where to store the data (separate multiple locations by comma):
#
path.data: /data/elasticsearch ←データディレクトリの指定。デフォルトから変更推奨。
#
# Path to log files:
#
path.logs: /var/log/elasticsearch ←ログのアウトプット先の指定。デフォルトのままでOK。
#
# ----------------------------------- Memory -----------------------------------
#
# Lock the memory on startup:
#
#bootstrap.memory_lock: true
#
# Make sure that the heap size is set to about half the memory available
# on the system and that the owner of the process is allowed to use this
# limit.
#
# Elasticsearch performs poorly when the system is swapping the memory.
#
# ---------------------------------- Network -----------------------------------
#
# Set the bind address to a specific IP (IPv4 or IPv6):
#
network.host: 0.0.0.0 ←Curlの問い合わせ元の制限、デフォルトだと自分からしか問合せできない。0.0.0.0にしてFirewalldで制御がおすすめ。
#
# Set a custom port for HTTP:
#
#http.port: 9200 ←ポート番号を変えたい場合はここを変更。
#
# For more information, consult the network module documentation.
#
# --------------------------------- Discovery ----------------------------------
#
# Pass an initial list of hosts to perform discovery when new node is started:
# The default list of hosts is ["127.0.0.1", "[::1]"]
#
#discovery.zen.ping.unicast.hosts: ["host1", "host2"]
#
# Prevent the "split brain" by configuring the majority of nodes (total number of master-eligible nodes / 2 + 1):
#
#discovery.zen.minimum_master_nodes:
#
# For more information, consult the zen discovery module documentation.
#
# ---------------------------------- Gateway -----------------------------------
#
# Block initial recovery after a full cluster restart until N nodes are started:
#
#gateway.recover_after_nodes: 3
#
# For more information, consult the gateway module documentation.
#
# ---------------------------------- Various -----------------------------------
#
# Require explicit names when deleting indices:
#
#action.destructive_requires_name: true
・起動
CentOS7系ならばrpmインストールした段階でsystemctlが使えるはずです。
systemctl enable elasticsearch
systemctl start elasticsearch
これで起動します。
ステータスはこのようになればOKです。
ちなみに起動に少し時間(3分ほど)がかかります。
● elasticsearch.service - Elasticsearch
   Loaded: loaded (/usr/lib/systemd/system/elasticsearch.service; disabled; vendor preset: disabled)
   Active: active (running) since 日 2019-03-03 20:39:22 JST; 3h 22min ago
     Docs: http://www.elastic.co
 Main PID: 80632 (java)
   CGroup: /system.slice/elasticsearch.service
           tq80632 /bin/java -Xms2g -Xmx2g -XX:+UseConcMarkSweepGC -XX:CMSIni...
           mq80687 /usr/share/elasticsearch/modules/x-pack-ml/platform/linux-...

 3月 03 20:39:22 hostname systemd[1]: Started Elasticsearch.
 3月 03 20:39:22 hostname elasticsearch[80632]: OpenJDK 64-Bit Server VM...
Hint: Some lines were ellipsized, use -l to show in full.
・起動しないぞ?というときは
1.JvmOptionでメモリ容量を拡張する
Memory leakうんたらとエラーが起きる場合はJVMでSwapしてる場合があります。
vi /etc/elasticsearch/jvm.optionsにてメモリの要領を拡張してあげましょう。
vi /etc/elasticsearch/jvm.options

#22行目あたり
 # Xms represents the initial size of total heap space
 # Xmx represents the maximum size of total heap space

-Xms1g →2gに
-Xmx1g →2gに
※ちなみにv5ではデフォルトが512MBとなっており高確率でこれが発生します。
2.設定ファイルが誤っている
SystemctrlでJavaに関するエラーが起こってる場合は大体elasticsearch.ymlの設定ミスです。
コンフィグレーション(Kibana)
Kibanaも同様に/etc/kibana/kibana.ymlにて設定を変更します。
Kibanaは主にアクセスを許可するIPと参照するElasticsearchのアドレスのみです。
# Kibana is served by a back end server. This setting specifies the port to use.
server.port: 5601

# Specifies the address to which the Kibana server will bind. IP addresses and host names are both valid values.
# The default is 'localhost', which usually means remote machines will not be able to connect.
# To allow connections from remote users, set this parameter to a non-loopback address.
server.host: "0.0.0.0" ←アクセスを許可するIP

# Enables you to specify a path to mount Kibana at if you are running behind a proxy.
# Use the `server.rewriteBasePath` setting to tell Kibana if it should remove the basePath
# from requests it receives, and to prevent a deprecation warning at startup.
# This setting cannot end in a slash.
#server.basePath: ""

# Specifies whether Kibana should rewrite requests that are prefixed with
# `server.basePath` or require that they are rewritten by your reverse proxy.
# This setting was effectively always `false` before Kibana 6.3 and will
# default to `true` starting in Kibana 7.0.
#server.rewriteBasePath: false

# The maximum payload size in bytes for incoming server requests.
#server.maxPayloadBytes: 1048576

# The Kibana server's name.  This is used for display purposes.
#server.name: "your-hostname"

# The URLs of the Elasticsearch instances to use for all your queries.
elasticsearch.hosts: "http://localhost:9200" ←Kibanaが参照するelasticsearchのIPアドレス

# When this setting's value is true Kibana uses the hostname specified in the server.host
# setting. When the value of this setting is false, Kibana uses the hostname of the host
# that connects to this Kibana instance.
#elasticsearch.preserveHost: true

# Kibana uses an index in Elasticsearch to store saved searches, visualizations and
# dashboards. Kibana creates a new index if the index doesn't already exist.
#kibana.index: ".kibana"

# The default application to load.
#kibana.defaultAppId: "home"

# If your Elasticsearch is protected with basic authentication, these settings provide
# the username and password that the Kibana server uses to perform maintenance on the Kibana
# index at startup. Your Kibana users still need to authenticate with Elasticsearch, which
# is proxied through the Kibana server.
elasticsearch.username: "    " ←elasticsearchのユーザー認証がある場合
elasticsearch.password: "    " ←elasticsearchのユーザー認証がある場合

# Enables SSL and paths to the PEM-format SSL certificate and SSL key files, respectively.
# These settings enable SSL for outgoing requests from the Kibana server to the browser.
#server.ssl.enabled: false
#server.ssl.certificate: /path/to/your/server.crt
#server.ssl.key: /path/to/your/server.key

# Optional settings that provide the paths to the PEM-format SSL certificate and key files.
# These files validate that your Elasticsearch backend uses the same key files.
#elasticsearch.ssl.certificate: /path/to/your/client.crt
#elasticsearch.ssl.key: /path/to/your/client.key

# Optional setting that enables you to specify a path to the PEM file for the certificate
# authority for your Elasticsearch instance.
#elasticsearch.ssl.certificateAuthorities: [ "/path/to/your/CA.pem" ]

# To disregard the validity of SSL certificates, change this setting's value to 'none'.
#elasticsearch.ssl.verificationMode: full

# Time in milliseconds to wait for Elasticsearch to respond to pings. Defaults to the value of
# the elasticsearch.requestTimeout setting.
#elasticsearch.pingTimeout: 1500

# Time in milliseconds to wait for responses from the back end or Elasticsearch. This value
# must be a positive integer.
#elasticsearch.requestTimeout: 30000

# List of Kibana client-side headers to send to Elasticsearch. To send *no* client-side
# headers, set this value to [] (an empty list).
#elasticsearch.requestHeadersWhitelist: [ authorization ]

# Header names and values that are sent to Elasticsearch. Any custom headers cannot be overwritten
# by client-side headers, regardless of the elasticsearch.requestHeadersWhitelist configuration.
#elasticsearch.customHeaders: {}

# Time in milliseconds for Elasticsearch to wait for responses from shards. Set to 0 to disable.
#elasticsearch.shardTimeout: 30000

# Time in milliseconds to wait for Elasticsearch at Kibana startup before retrying.
#elasticsearch.startupTimeout: 5000

# Logs queries sent to Elasticsearch. Requires logging.verbose set to true.
#elasticsearch.logQueries: false

# Specifies the path where Kibana creates the process ID file.
#pid.file: /var/run/kibana.pid

# Enables you specify a file where Kibana stores log output.
#logging.dest: stdout

# Set the value of this setting to true to suppress all logging output.
#logging.silent: false

# Set the value of this setting to true to suppress all logging output other than error messages.
#logging.quiet: false

# Set the value of this setting to true to log all events, including system usage information
# and all requests.
#logging.verbose: false

# Set the interval in milliseconds to sample system and process performance
# metrics. Minimum is 100ms. Defaults to 5000.
#ops.interval: 5000

# Specifies locale to be used for all localizable strings, dates and number formats.
#i18n.locale: "en"
・起動
systemctl enable kibana
systemctl start kibana
これで起動できます。こいつもまた起動に時間がかかります。
・Kibana server is not ready yetと表示される
ぐぐると「アップデートした際に出るようになった」との記事が出てきます。
初回起動時のこれは「大体本当に準備ができてない」ことが多いので待ちましょう。5分くらい。
2019/07追記
それでも動かないというときは「elasticsearchクラスタが動いてない」可能性が高いです。
以下をチェックしましょう。
・curl http://localhost:9200/_cat/nodes?vでノード一覧を取得。動いてないクラスタが無いか確認。
・オールインワン構成の場合はJVMのメモリ容量が足りてない場合が多い、var/log/messagesを確認
それとKibanaはElasticsearchの起動後に起動してください。
アクセスするときはポート番号5601を忘れずに。ブラウザでKibanaにアクセスしてみましょう。
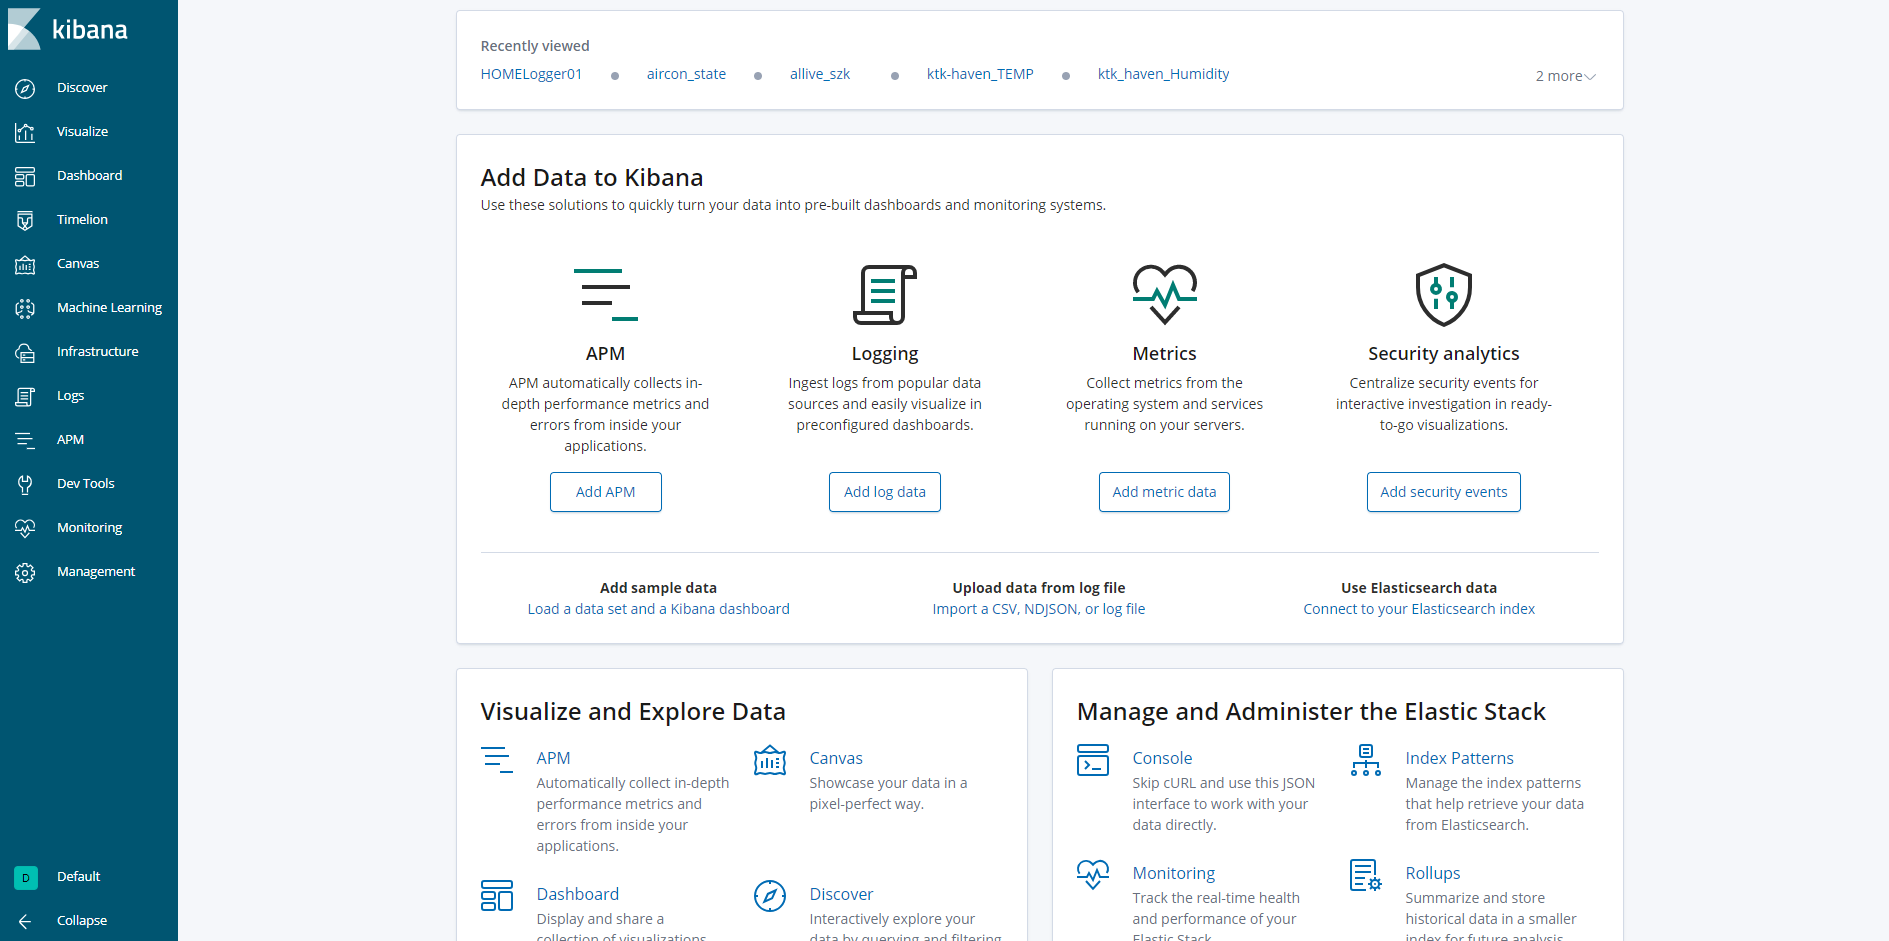
この画面が出てくればOKです!
とりあえず今日はここまで。